Making Atwater Kent Breadboard Buss Sleeving
By Robert Lozier – KD4HSH
kd4hsh@carolina.rr.com
Many of us interested in the first generation of broadcast receivers made in the early 1920s are fascinated by the Atwater Kent “open sets”. The company had entered the radio manufacturing market by making individual components designed to be mounted onto, usually wood, panels. They were absolute masters in turning-out the highest quality Bakelite moldings to house or support their electrical parts. They expanded their product line and eventually offered fully assembled radios. The components were interconnected using single strand copper buss wire. (18 AWG) All the top side wires were covered by lengths of sleeving generically called “varnished cambric tubing”. This tubing is tightly braided linen thread coated with multiple coats of translucent dark amber varnish. Over time it becomes a dark, glossy brown and most becomes brittle. Lengths of the same tubing are also used on the underside of the baseboard.
The unhappy truth is that some of this sleeving breaks off or is gnawed-off by insects or mice and replacements must be found, however I have not been successful in finding any modern equivalents that come anywhere close to appearing true to the original.
That sent me off on a quest to find a way to make convincing replica sleeving in my home shop.
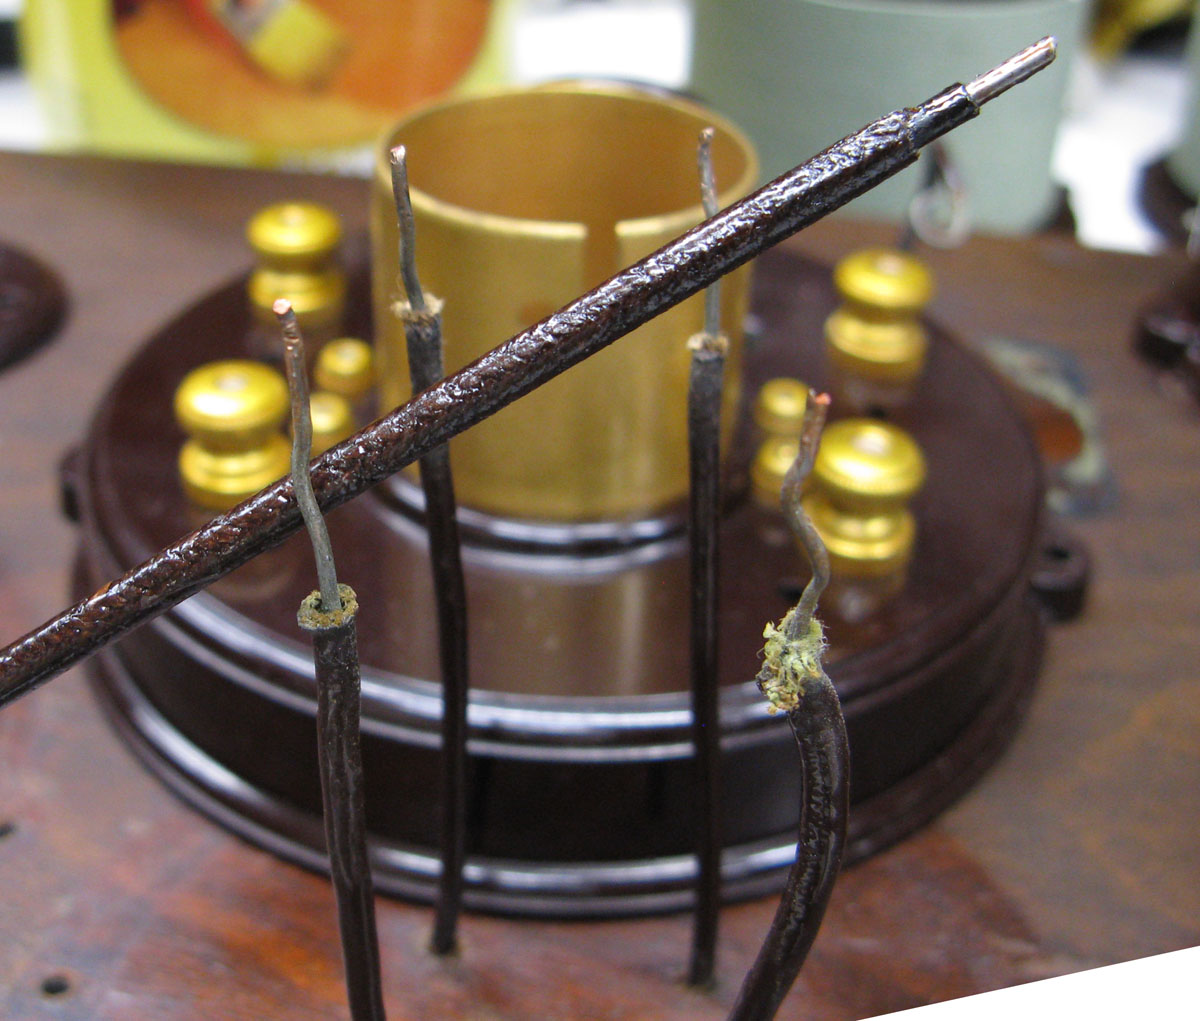
It is very difficult to photograph this tubing but maybe this shot will give you some idea of what is possible.
Hobby shops have lengths of “music wire” used in model aircraft building. Buy a length of 0.047” to 0.055” diameter. (A popular brand is K & S Engineering part number 502 or 503) Cut the wire to about 20”. Slip a length of 3/32” 2:1 thin wall polyolefin shrink tubing over the music wire and use a temperature regulated heat gun to carefully shrink the tubing completely. Be sure to allow air to escape completely, you cannot tolerate any trapped air bumps in the finished diameter. If you do get an air bubble you cannot work out, take a very fine sewing needle and carefully poke a hole for air to escape. You don’t want to make it so large that any glue contacts the music wire.
There is a brand of 3mm dia. waxed cotton beading cord available from this link: https://www.firemountaingems.com/itemdetails/h201349bs. Similar “3mm Waxed Cotton” cord is available in some craft stores in seven-yard lengths.…. Do not use 3mm Cotton “Macramé cord” because the braiding threads are much too coarse.
This waxed cotton bead cord consists of tightly braided threads over parallel strands of filler cord. Use tweezers to pull out the filler strands on a length of cord that is about 1 ½ times longer than your length of music wire. Your hollow braided cotton tube can now be slipped over the shrink tubing. Pushing this braid over the shrink tubing is not a fun task, but I can do it in about 12 to 15 minutes when using the 0.055” wire. It is an easier task if you use the 0.047 diameter music wire. Take time to evenly distribute and stretch the braid along your core of heat shrink and music wire.
Now you are ready to coat your sleeving with alcohol base “medium walnut” wood dye. I use Mohawk “Ultra” Penetrating Stain. For drying, support your length of sleeving by clamping the wire on one end so it does not have to lay across its length.
After drying, coat the sleeving with a mixture of “Titebond Veneer Glue” and the same wood dye mixed to the color of milk chocolate. Use a short bristle hog hair brush to vigorously massage the glue into the braid; but finish by removing any excess from the surface. As the glue becomes almost dry, transfer it to a plate of glass or Plexiglass. Use a card size plate of steel or plastic to roll the length back and forth to compress the cotton fibers and squeeze out excess glue. You may need to repeat this a few times to get the best effect. This fills the pores of the braiding and begins to impart the dark brown and glossy appearance you want in the finished sleeving. I use a cabinetmaker’s “cabinet scrape” to roll the tubing. When you roll the tubing, some of the glue will stick to the glass, the scraper makes it very easy to remove the residue from the glass.
Allow the wood glue to cure overnight. Use 220 sandpaper to lightly sand away any fuzz and wipe clean with a tack rag. Put on new rubber gloves and clamp only the music wire end into a bench vise and carefully pull the tubing off the wire. Do not pull with the expectation that the sleeving will release all at once. Instead, pull just a little at various points along the length and repeat a few times. Eventually the sleeving will begin to slide off smoothly. Note that the shrink fit tubing remains as the inside wall of your finished product and the gloves prevent skin oils from contaminating your tubing for the final step.
The sleeving is brushed with satin finish marine spar varnish. This varnish has a heavy body and a transparent amber hue. Indoor spar varnish is much thinner and therefore you will have to apply more coats to achieve a smooth finish. There are glossy versions of these varnishes that you should avoid.
The finished product is very, very close to the size, look and function of the original varnished cambric tubing. So close as to be intermixed with the vintage sleeving without attracting attention to how clever you might have been in your restoration activities.
Click Icon to Download PDF
